Overview
The new Out of Box Experience (OOBE) for DTEN Bar and Mate offers significant improvements over the previous version, enhancing user experience. This new OOBE addresses key customer feedback, making the setup and update processes more intuitive and efficient.
Benefits of the New Out-of-Box Experience
-
Network Certificate Upload Assistance
- Step-by-step instructions and explanations in DTEN WebGUI help users easily upload network certificates, ensuring secure network connectivity.
-
Enhanced Box-to-Upgrade Progress Visibility
- Improved flow provides visible progress during download and installation of upgrade packages, allowing users to track progress and estimate upgrade time.
-
Proactive OTA Server Connection Guidance
- Prompt to add OTA server to network firewall whitelist helps users overcome restrictions, ensuring successful retrieval of upgrade packages.
-
Flexible Network Connection Setup
- The option to skip network setup during initial device setup provides flexibility, allowing users to configure the device without an immediate network connection.
-
Manual Retry and Network Stability Guidance
- Empower users with a manual retry mechanism for failed upgrades and guide them on maintaining a stable network connection for successful upgrades.
These updates aim to boost user satisfaction by simplifying the OOBE process, addressing specific user concerns, and streamlining device setup and upgrades.
Supporting Product
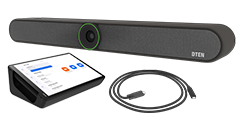
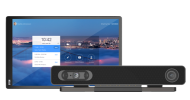
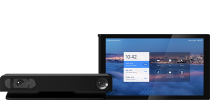
- DTEN Bar with v1.1.2 and above
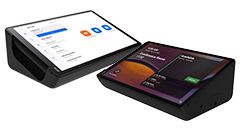
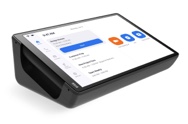
- DTEN Mate with v2.1.0 and above
Setup Instruction
Prerequisites
- Strongly Recommended: Maintaining a stable network connection throughout the OOBE process.
Step-by-step instructions
-
DTEN Bar and Mate Pairing
Upon reaching the first screen of the DTEN Bar's OOBE, you can either pair the device with a DTEN Mate or proceed with the remote control:
Option 1: Control your device through a DTEN Mate: you can activate your DTEN Bar’s control
through DTEN Mate by either:
- Enter the pairing code displayed on the DTEN Bar into DTEN Mate.
- Scanning the QR code displayed on the DTEN Mate with your DTEN Bar to establish a connection.
Option 2: Control your device with a mouse if you don't have a DTEN Mate handy:
- Click the click here button using the mouse to skip to the next step.
- Note: For Zoom use, pairing with a Zoom Room Controller or connecting to a touchscreen is required to control your DTEN Bar with a mouse. Click the Continue button.
-
Choose service platforms
You can choose different meeting platforms based on your needs. If you want to switch between meeting platforms, please factory reset the device and follow the same OOBE process.
-
Choose language
You can choose the language you prefer and then click "Next" to proceed to the next step. Currently, DTEN supports English, Spanish, Japanese, French, and German.
-
Network Setup
We recommend connecting your device to a wired network. However, you can also click "Select Wi-Fi Network Instead" to connect via Wi-Fi.
-
Advanced Network Setup
In the advanced network settings, you can configure proxies and IP configurations. After finalizing these settings, please click “Save” and “Next” to move on to the subsequent step.
Additionally, you can click "Next" to bypass this step temporarily and configure your network settings later via the device's settings page.
The “Certificates" tab provides DTEN WebGUI - Enterprise Security Support instructions. If your enterprise network requires uploading certificates such as 802.1x, you can remotely access the device through DTEN WebGUI and upload the certificates. Click "Next" to proceed to the next step.
-
Timezone
The device automatically sets the time zone based on its IP address and defaults to a 12-hour clock format. If you prefer the 24-hour clock format, you can manually select it. Click the "Change Timezone" button on the left to adjust the time zone. A list of time zones will appear, allowing you to choose the one that fits your location. After making your selection, click the "Next" button to proceed.
-
Out-of-box Software Update
The system will automatically check for any available updates for the device during this step, which may take up to 30 seconds to complete.
If your device is up to date, the following message will appear on your screen and automatically vanish after 5 seconds.
System Update Failed: If your corporate network’s firewall and security whitelist do not include DTEN's servers on their whitelist, the device will not be able to retrieve system updates. In this case, you will see the following message on your device screen. Scan the QR code in the screen's bottom right corner to learn how to configure your firewall and security whitelist settings.
New Version Found: If a new firmware version is available for your device, you will be directed to this page to initiate the update. Simply click on "Update Now".
Downloading: The download of the update package is in progress. The circle represents the current completion progress.
If the package download fails, an error message will appear. You can manually retry the download or opt for an automatic update overnight.
Installing the update package
System setup: You will see the following interface when the system is successfully updated. The system will restart and then be ready for you.
If you have additional questions or need to contact DTEN Support, please refer to this DTEN Knowledge Base article for more details: HERE.










Comments
0 comments
Please sign in to leave a comment.